
 This is one of my favorite spoof ads.
For those who market for restaurants or food chains, the clear choice for burger “modeling” is the burger to the left. Sure, it’s had some work done (the nature of this work is the meat of this post), but it’s more likely to appeal to people’s appetites and get them in the door. On the other hand, the right-side burger is a sad cheeseburger. People won’t clamor to your tables shoving fistfuls of cash at you for a chance at that burger. In fact, they’ll probably lose their appetite (sorry, sad cheeseburger).
Food photography can be tricky, but if you market food (for a restaurant, a baking blog, your own Instagram…) it’s a priceless tool to possess. Your sandwiches do not have to be supermodels, but you don’t want them to appear sub-par (hehe) on your website or social media. I’m also going to assume that you don’t have the disposable income required for hiring a food stylist (which sounds like a pretty cool job, right?).
As this article from Huffington Post says, “optimistic restaurant owners” are often well-intentioned when it comes to food photography, but they don’t always have the skill to reach the desired outcome. Here are a few basics on food photography that will get the camera loving your food.
Lighting. This means the elements of photography like exposure, saturation, and flash. Oftentimes, doing a photo-shoot inside a restaurant is hard. The lighting is usually dim or fluorescent, neither of which are conducive to good photos. What’s a photographer to do? In this case, you can do a few things. Set up a mini photo-shoot area and adjust the lighting there (it’s easier to fiddle with a small area than the lighting of the whole restaurant). Another option is working with the lighting you currently have and editing later (the only issue here is making sure you have photo editing software available).

These guys are sad.

These guys are happy!
Personally, I know very little about optimal lighting and camera settings, but this blog post goes into greater detail about lighting (including things like depth of field and ISO).
Temperature. Hot food should look hot, cold food should look cold. A pot roast is not going to look appetizing if the gravy has congealed (ew). No one looks at a picture of a melted ice cream cone and thinks “Yes, THAT is what I want!” An interesting fact I learned while writing this post: fake ice is a real thing that people pay money for. Restaurants that offer a lot of drink specials don’t use real ice in photos, since it often melts under lighting, so they simply whip out the fake ice cubes and all is well.
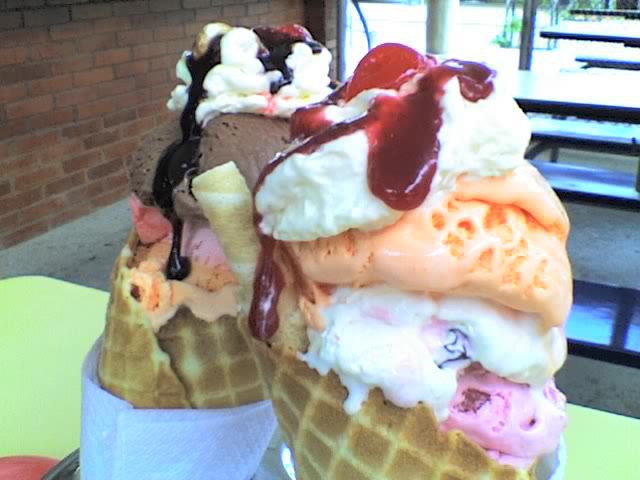
This is not an ice cream I want in my life. And that’s a strong statement, folks.
Background. Food stylists recommend using white plates to showcase meals. Colors and definition are more apparent. That way, the food colors don’t blend in with the plate colors and leave you with an image of a meal that looks like an unappetizing amorphous blob. If you aren’t using a faux setup for your photo shoot, always keep your background in mind.
Arrangement. Another cool fact: most of the food you see in advertisements is actually inedible. That ideal beauty burger from the beginning of this post? It might look good, but it also might kill you. In order to shape and support food, stylists will insert cardboard between layers of pancakes or sandwiches, stuff paper towel to add volume, or use aluminum foil to prop things a certain way (like in all those pictures of wavy bacon). If you are attempting to artistically stack your food, you can avoid creating a leaning tower of pancakes by using toothpicks or skewers to keep things in place.

The above image is from a really awesome blog post about working with what you’ve got in terms of food photography. Sometimes, there will be a frosting fail or a crumbly cake, but there’s always a workaround.
Freshness. This is probably a no-brainer, but examine the food you’re snapping pictures of beforehand, especially if it’s produce. Don’t use brown fruits and vegetables. If a dish you’re taking a picture of has an element that will turn brown quickly (say, apples), get those pictures first. Another cool trick is spritzing produce with water or oil to create a fresh look. Freshness also ties in with temperature- if a hot meal has gone cold and gets that gross crusty or congealed look…maybe try again.
To sum it up: don’t let your food photography be a sad cheeseburger (especially if said food photography is for promotional purposes).